I saw Alan Ma’s tweet about building a tiny TPU in less than a month and kept thinking, “Is it really easier than it sounds?” So I tried to walk the same path and see if I could ship something in a week.
This is my personal experience of what worked, what broke, and what I learned.
Starting point: a 4x4 systolic array
I started from a simple 4x4 systolic array I had built before with @cupx0j0e. I fixed a few pipeline issues, cleaned up the design, and then decided to make it a real peripheral instead of a standalone block.
Making it a real peripheral
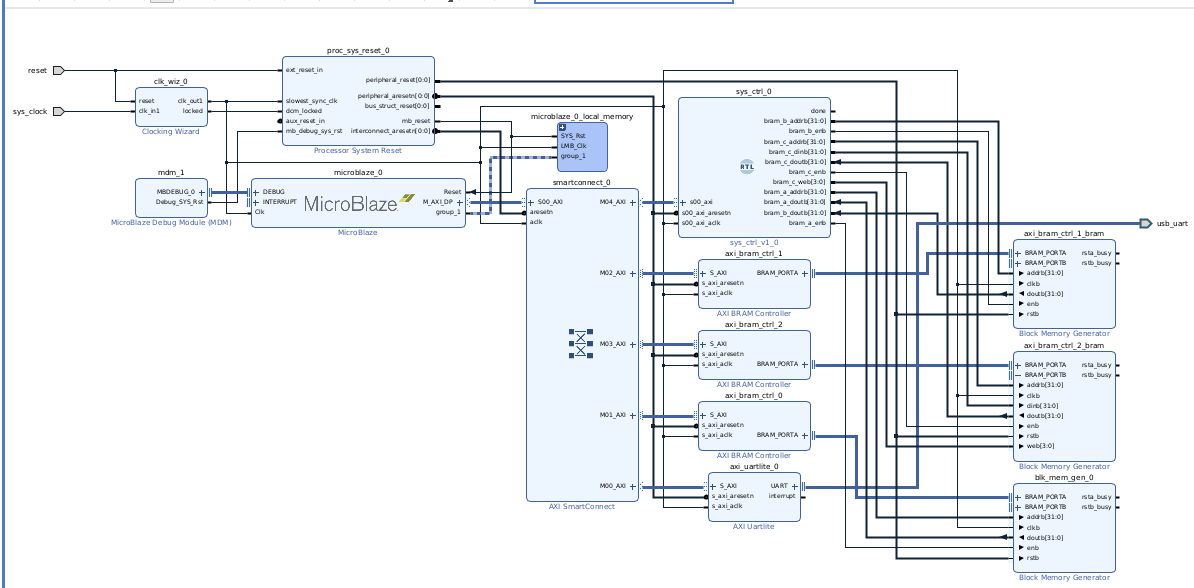
I added AXI support, dropped it into a Vivado block design, connected it to MicroBlaze, and mapped weights/inputs/outputs as BRAM tiles.
This was my first time actually setting up Vivado, block design, and MicroBlaze end-to-end, so I spent a lot of time learning how the system actually boots and resets.
Bring-up pain (and a lot of debugging)
I got stuck for a while because the reset logic never deasserted MicroBlaze. The proc_sys_reset blocks were not behaving like I expected, and I had to learn how Vivado’s debugging tools actually work instead of just guessing.
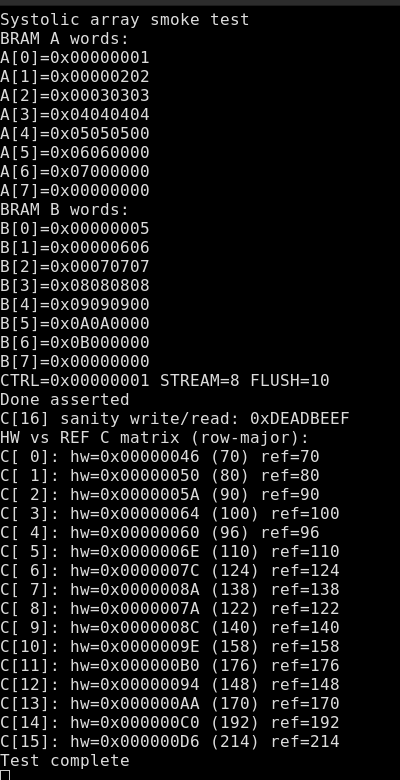
Once I fixed that, I wrote a simple systolic array smoke test. It took more time than I expected because the AXI I wrote had timing issues with the BRAM setup.
Feeding it from PyTorch
After the smoke test, I made helpers so the systolic array could run PyTorch GEMMs over UART. At first the firmware sent one tile at a time (painfully slow but correct). Later I switched to multi-tile batching, which finally made it feel fast and usable.
Real models and pushing limits
To get a real model running, I took their own horizontal and vertical differentiator and ran it on my FPGA. That actually worked beautifully.
Then I tried to push it:
- Multi-tile batching in firmware.
- Using DSPs for the PEs instead of pure LUT math.
After those changes, performance felt instantly better.
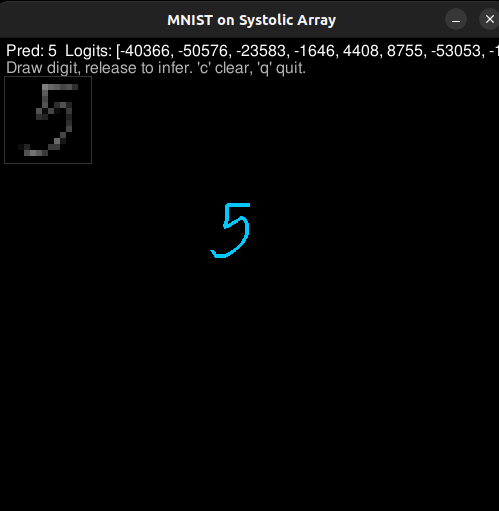
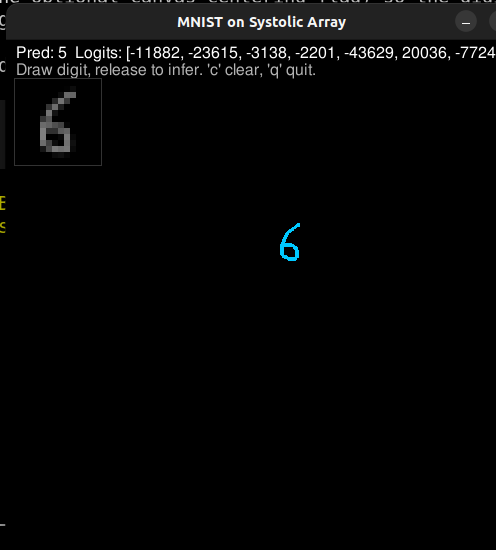
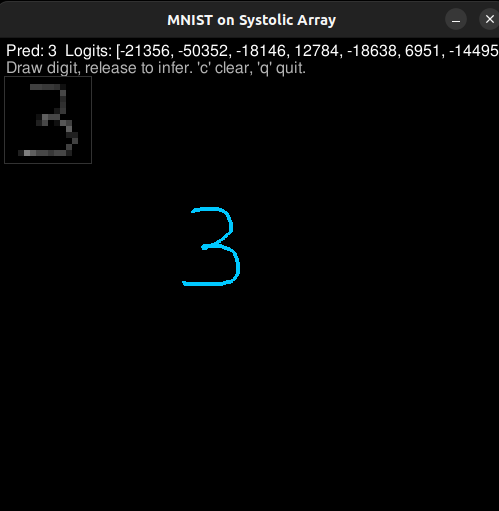
Finally, I tried an MNIST classifier: a small 2-layer MLP with 8 hidden units. It worked a few times, but it was slow (around 30 seconds to print results) and fragile. The tricky part was the inference path from pygame into an MNIST-like input format. That pipeline was the first time I had built something end-to-end like this, and it showed.
MNIST demo shots
A few screenshots and a short capture from the pygame drawing loop + inference run.

What I learned
- Turning a neat RTL block into a real peripheral is half the work.
- Vivado bring-up is its own craft: resets, clocks, and timing can kill you.
- AXI plus BRAM timing needs discipline, not just “it simmed once.”
- Small firmware changes (like batching) can be bigger wins than RTL tweaks.
Where I stopped
After the MNIST attempt, I gave up on pushing further. It still felt like a win: I got an actual model to run on hardware I built, and I learned how these systems fit together instead of just reading about them.
If I revisit this, I want to make the host-to-FPGA data path cleaner and build a more reliable input pipeline. But for a week-long experiment, it was more fun than I expected.